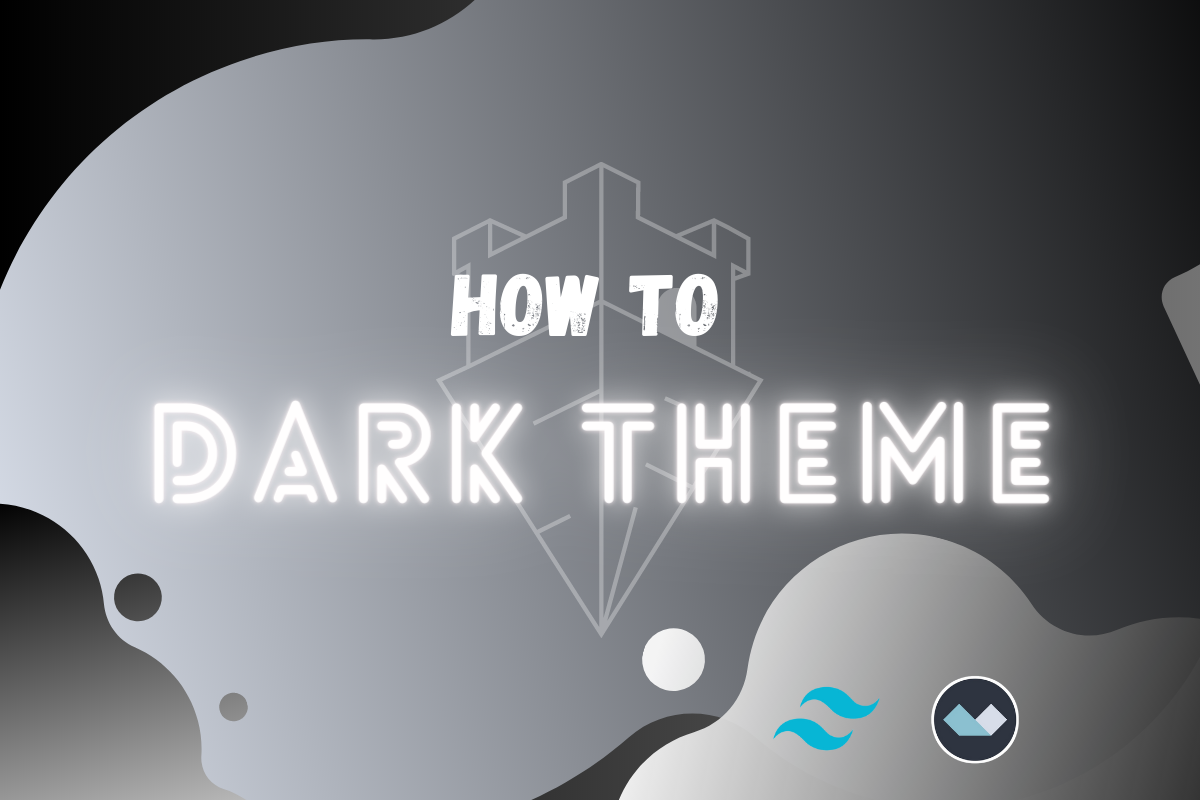
Dark Theme with Laravel Tailwind and Alpine.js
— 13 min read

Welcome, brave Realmer, to the intriguing world of shadows and code! Are you ready to embark on a journey where dimmed hues reign supreme and aesthetics meet functionality? Prepare to take a nocturnal expedition into the heart of 'Dark Theme with Laravel Tailwind and Alpine.js.'
In the realm of modern web design, dark themes are more than a trend; they are a revelation. Providing comfort to the eyes of the night-loving coder and adding a sleek touch to the user interface, the art of mastering a dark theme is akin to wielding a powerful spell.
Prerequisites
- Installation of fresh Laravel Application
- Installation of TailwindCSS
- Installation of Alpine.js
- Dark theme setup.
The steps for the first three can be found in this Readme that I set up for you!
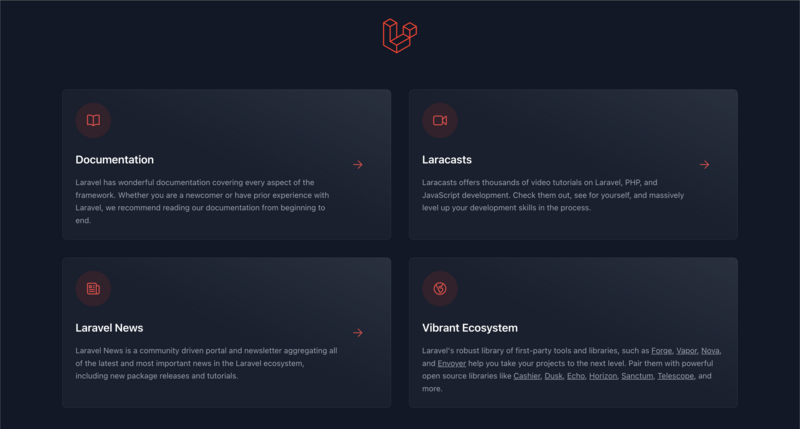
Your final result should be something like this:
Small Disclaimer For this guide, I'm making a friendly assumption: you've already dabbled with Laravel, Tailwind, and Alpine.js to some degree. We won't be delving into the absolute basics here. Instead, we're building upon the foundation you've set, aiming to enhance and enrich your existing knowledge. So, if terms like 'blade components', 'utility classes', or 'x-data' sound familiar, you're in the right place. However, if you're feeling adventurous and love a good challenge, by all means, dive right in! But if these terms are entirely foreign, it might be worthwhile to embark on a quick refresher on these frameworks first.
Crafting the Perfect Dark Theme: Strategy & Best Practices
To be honest, the development of a dark theme is not that difficult, but there are some minor details that I found very interesting and I wanted to mention. Let's start with the foundational steps, and along the way, I'll highlight those sneaky challenges that might pop up just when you think you've got everything perfect. Ready to explore together?
⼻ 1. Setting up the basics
Once you're all set up with your environment, kick things off by executing npm run dev. Keep this running in the background. If you're running the most recent version of Laravel, you should have Vite installed, which makes the development process smoother and faster.
Now, to integrate the dark mode functionality with Tailwind, let's dive into the tailwind.config.js file. This configuration file is where the magic happens for our styling framework. Here's what you'll need to tweak:
export default {
    darkMode: 'class', // This is our star player for the dark mode!
    content: [
        "./resources/**/*.blade.php",
        "./resources/**/*.js",
    ],
    theme: {
        extend: {},
    },
    plugins: [],
}
Notice the darkMode: 'class' line? That's instructing Tailwind to toggle dark mode styling based on class names. A simple yet powerful feature!
Moving on, let's head over to the welcome.blade.php file. In the body section, sprinkle in a little Alpine.js magic:
<body x-data="{darkMode: false}" :class="{'dark': darkMode === true }" class="antialiased">
What we've done here is utilized Alpine.js to manage our theme toggle. By default, we've set darkMode to false, indicating the light theme. Want to see the dark side in action? Switch that false to true, and voila! Just with these slight modifications, you can now toggle between Laravel's default light and dark welcome page themes. It's impressive how just a few lines of code can bring about such a dynamic change, right?
⼻ 2. Crafting a Manual Dark Theme Toggle with a Blade Component
This is the main toggle button that I am using most of the time! It’s no rocket science but has the pizzazz that makes it a crowd favorite, take a look:
<button @click="darkMode=!darkMode" type="button" class="relative inline-flex flex-shrink-0 h-6 mr-5 transition-colors duration-200 ease-in-out border-2 border-transparent rounded-full cursor-pointer bg-zinc-200 dark:bg-zinc-700 w-11 focus:outline-none focus:ring-2 focus:ring-neutral-700 focus:ring-offset-2" role="switch" aria-checked="false">
   <span class="sr-only">Use setting</span>
   <span class="relative inline-block w-5 h-5 transition duration-500 ease-in-out transform translate-x-0 bg-white rounded-full shadow pointer-events-none dark:translate-x-5 ring-0">
      <span class="absolute inset-0 flex items-center justify-center w-full h-full transition-opacity duration-500 ease-in opacity-100 dark:opacity-0 dark:duration-100 dark:ease-out" aria-hidden="true">
         {{--
         <x-svg class="w-4 h-4 text-neutral-700" svg="sun"/>
         --}}
         <svg  xmlns="http://www.w3.org/2000/svg" class="icon icon-tabler icon-tabler-sun w-4 h-4 text-neutral-700" width="24" height="24" viewBox="0 0 24 24" stroke-width="1" stroke="currentColor" fill="none" stroke-linecap="round" stroke-linejoin="round">
            <path stroke="none" d="M0 0h24v24H0z" fill="none"></path>
            <path d="M12 12m-4 0a4 4 0 1 0 8 0a4 4 0 1 0 -8 0"></path>
            <path d="M3 12h1m8 -9v1m8 8h1m-9 8v1m-6.4 -15.4l.7 .7m12.1 -.7l-.7 .7m0 11.4l.7 .7m-12.1 -.7l-.7 .7"></path>
         </svg>
      </span>
      <span class="absolute inset-0 flex items-center justify-center w-full h-full transition-opacity duration-100 ease-out opacity-0 dark:opacity-100 dark:duration-200 dark:ease-in" aria-hidden="true">
         {{--
         <x-svg class="w-4 h-4 text-neutral-700" svg="moon"/>
         --}}
         <svg xmlns="http://www.w3.org/2000/svg" class="icon icon-tabler icon-tabler-moon w-4 h-4 text-neutral-700" width="24" height="24" viewBox="0 0 24 24" stroke-width="1" stroke="currentColor" fill="none" stroke-linecap="round" stroke-linejoin="round">
            <path stroke="none" d="M0 0h24v24H0z" fill="none"></path>
            <path d="M12 3c.132 0 .263 0 .393 0a7.5 7.5 0 0 0 7.92 12.446a9 9 0 1 1 -8.313 -12.454z"></path>
         </svg>
      </span>
   </span>
</button>
This elegant piece of code is more than just a button. It's the key to toggling between the day and night modes, relying on the darkMode variable which we previously initialized in the body section.
For better reusability and modularity, I'd recommend housing this toggle within its own Blade component. Create a folder named components under resources/views and create a file named theme-toggle.blade.php and nest this code snippet inside. This approach not only organizes your codebase but also allows for easier integration across various parts of your Laravel application.
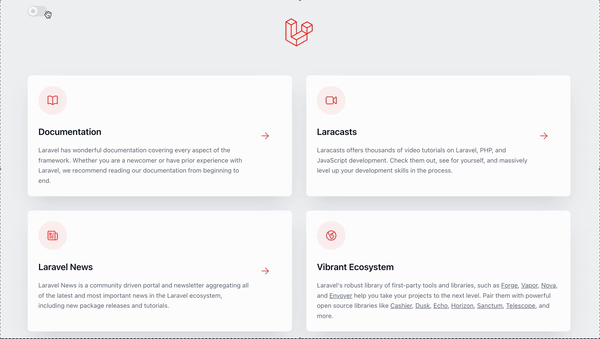
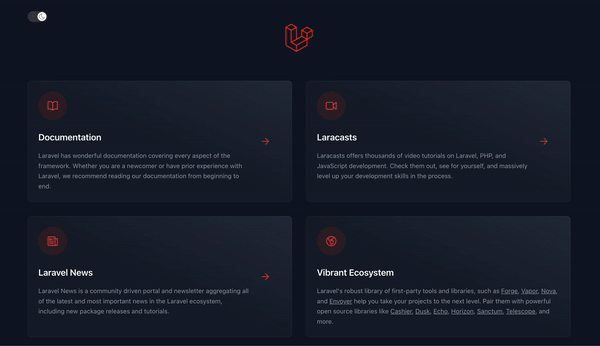
Now make your welcome.blade.php file look like this:
...
<div class="max-w-7xl mx-auto p-6 lg:p-8">
    <x-theme-toggle/>
...
And THAT! is what I like to call, **clean **✨!
By now you should have this result:
🗒️ Small Note
You may have noticed the commented code <x-svg class="w-4 h-4 text-neutral-700" svg="sun"/> and <x-svg class="w-4 h-4 text-neutral-700" svg="moon"/>. If you are curious about what these little sneaky comments are you should take a look at this Laravel Blade SVG Component 👀.
⼻ 3. Solving the Page Refresh Bug: The Magic of Alpine.js persist
Ah, the notorious page refresh bug! An age-old nemesis for web developers everywhere, especially when working on features like theme toggling. But in our realm, we have the magic of Alpine.js at our disposal, and one spell in particular: persist.
Here's the essence of what persist does: It helps maintain the state of the darkMode variable, even if the user refreshes the page. This ensures that the chosen theme (dark or light) remains consistent throughout the user's session. Magical, isn't it?
The code for this solution is just one line:
<body x-data="{darkMode: $persist(false)}" :class="{'dark': darkMode === true }" class="antialiased">
Well, there's not much more to it!
Livewire v3 update 👾
As I was cooking a new Livewire v3 project I realized that I didn't have to install the
$persistplugin anymore, nor did I have to implement it on myapp.jsfile, which is neat and cool. cool cool cool.
Livewire v2
Once you do it you will find out that now your code is a bag full of errors! And that happens because the persist function is not built-in to Alpine.js by default. We have to install it as a plugin. Take a look at the 📖 documentation of persist plugin. I would advise you also to take a look at the How it works paragraph of the documentation just to understand the underlying technology of javascript and modern browsers that is being used.
Quick Installation Guide I always like installing via npm because I like to keep dependencies at a minimum, so let's:
npm install @alpinejs/persist
Now that's done and we have to initialize from our bundle app.js under resources and make it look like this:
import './bootstrap';

import Alpine from 'alpinejs'
import persist from '@alpinejs/persist'

window.Alpine = Alpine

Alpine.plugin(persist)

Alpine.start()
And there you have it! Toggle between light and dark themes, refresh, and see it stick. Pretty neat, right?
Is that... The Flicker Bug?
But just when you thought we were sailing smoothly into the night, a subtle disturbance appears on the horizon. As with every great story, there's always that unexpected twist waiting in the shadows. In our tale of themes and toggles, this adversary is known by many as... the Flicker Bug. It's a brief, unwelcome shimmer, often overlooked but notorious among those who seek pixel perfection. Prepare yourself, for in the next chapter, we'll confront this elusive glitch and strive to banish it for good.
⼻ 4. Squashing the Flicker Bug
The flicker bug is a common issue faced when implementing theme toggles on websites. Essentially, it's a brief flicker or flash between the light and dark modes that happen during page load. This can lead to a less smooth user experience, as the transition between themes isn't as seamless as one might hope. The problem typically arises due to the slight delay in applying the chosen theme's styles on the initial page render.
You can easily reproduce this problem by continuously hitting the ctrl+shift+R button combination on your keyboard like a maniac!
The solution is ridiculously easy and it lies in the use of x-cloak in conjunction with x-data="{darkMode: $persist(false)}".
Here's a breakdown:
x-cloak: This Alpine.js directive is akin to an invisibility cloak for our element. When elements have the x-cloak attribute, they are hidden from the user's view. The attribute is removed (and thus, the element is made visible) only when Alpine has made its initial updates to the element. By using x-cloak, we ensure that the element is only displayed when it's in its correct state, eliminating the jarring flicker.x-data="{darkMode: $persist(false)}": This bit of code as I mentioned before is responsible for persisting the user's theme preference. The $persist function ensures that the darkMode state (either true for dark mode or false for light mode) is remembered across page loads. When the page is loaded, Alpine.js quickly checks this persisted value to determine which theme to display, ensuring that the chosen theme's styles are applied immediately upon the initial render.
Together, these two directives act as a tag-team, ensuring that the chosen theme is not only recalled but also rendered smoothly, offering a seamless experience for the end user.
First, we need to make the x-cloak work, so just add this one line in your resources/app.css:
@tailwind base;
@tailwind components;
@tailwind utilities;

[x-cloak] { display: none !important; } /*<-- This Line right here!*/
Now you can use the x-cloak anywhere you see fit. For now, let's add it only where we need it.
...
<body x-cloak x-data="{darkMode: $persist(false)}" :class="{'dark': darkMode === true }" class="antialiased">
...
</body
And we are set to go. The elusive flicker bug has been caught and smashed 🐞🩴💀!
Github
You can find the code for this project ready to clone, explore and play, right here 👉 dark-theme-with-laravel-tailwind-and-alpinejs.
Conclusion
The journey into the world of 'Dark Theme with Laravel, Tailwind, and Alpine.js' is a testament to how modern web technologies can interplay to create delightful user experiences. Dark themes, now more than just a trend, offer visual comfort and a dash of aesthetics that developers and users alike appreciate.
The integration process detailed here is sequential and precise, making it easy for any developer with some prior knowledge of the tools at hand to implement a dark theme. However, this isn't just a straightforward process. Along the way, common challenges that developers face are addressed. From the initial setup of environments and tools, integrating Tailwind for dark mode, adding a manual dark theme toggle using Blade components, to advanced solutions like tackling the page refresh bug with Alpine.js's persist plugin, and finally, the elusive Flicker Bug.
Well, that was all folks! I hope you found this guide useful. And I really hope that you will find a cool way to play around with this feature while building crazy cool dark themes for your projects! May your coding journey be ever illuminated, whether by the soft glow of a dark theme or the radiant brilliance of new knowledge. Happy coding to all!
Get Better at Laravel!
Do you know what is the best way to learn Laravel? Laracasts of course! What else?
Why Every Dev is Raving About Laracasts:
🚀 All-Star Cast: Learn Laravel from the best! We're talking the creator of Laravel, Taylor Otwell, the genius behind Livewire, Caleb Porzio, and more Laravel legends.
🛠️ Full Toolkit: It’s not just Laravel! Dive deep into Livewire, Alpine.js, and the entire Laravel ecosystem and its intricacies.
🔄 Always Fresh: With direct insights from industry leaders, you’re getting content that’s not just up-to-date, but ahead of its time.
💡 Real-World Ready: Theory’s cool, but practical knowledge? Priceless. Jump from lesson to project seamlessly.
👩💻 Join the Elite: Step into a community that’s all about pushing boundaries and perfecting the craft.
Bottom line: Want to level up fast? Laracasts is your jam. Dive in using my referral link and join the coding revolution. 🔗 Laracasts
🚀 Spread the Love & Support the Realm
Hey there, fellow Realmer! If this guide illuminated a new path in your coder/hacker journey, your support would mean a lot. Every bit of magic helps.
Spread the Love
👑 Crown & Share: If you found value in this post, please give it a crown and share it with your fellow coder/hacker enthusiasts. Spreading knowledge is what Sudorealm is all about! Fun fact the Author with the most crowns inside a realm will be crowned as the Realm King! 🤴
🆇 X Shoutout: Feeling extra grateful or have some cool feedback? Drop me a shoutout on Twitter – I'd love to hear from you! d3adR1nger on X
💬 Join our Discord Server: Join the Sudorealm Discord Server connect with fellow enthusiasts and chat about everything that fascinates you! From new blog post suggestions to seeking support on tricky tutorials. Come, share your ideas, and let's grow together! 🚀🌐
Support the Realm
🛍 Affiliate Treasures Below: Dive into the depths below the post to uncover some affiliate products I've curated just for you. It's a great way to support the realm and discover some nerdy treasures.
☕️ Coffee Driven Development: Love what you're reading? Fuel my passion for coding with a delicious cup of coffee! Every sip powers up another line of code and helps bring more exciting content your way. Support my caffeine-fueled coding adventures and let's brew up something amazing together! ☕👨💻 Join the journey and BuyMeACoffee

Thanks for being a part of our realm. Every bit of support propels our community to new horizons. Until next time, keep exploring!