Parrot OS Virtual Machine for Hack The Box: A Step-by-Step Guide
— 9 min read

Alright! Let's wear our black hoodies and a pirate's leg and go hack the box, what do you say?
Now that I am thinking about it, I should have named this article "How to Hack like Captain Hook". That would be awesome, wouldn't it? 🏴☠️
Please let me explain, this article is about starting your hacking journey with the help of ParrotOs and HackTheBox and also gives an alternative way of connecting to HackTheBox's hidden IPs with the use of a shared VPN connection between our host and our VM machine. This method is quite helpful to grasp as a beginner for a few reasons:
- Network Stability: Sharing a VPN connection between your host and VM machine ensures a stable and consistent network environment.
- Simplified Configuration: Utilizing your host's internet connection and VPN setup streamlines the configuration process. It eliminates the need for complex network settings within the VM, making it easier to set up and manage.
- Enhanced Security: By leveraging a shared VPN connection, you ensure that all traffic between your VM and Hack The Box is encrypted and secure.
- Resource Efficiency: Sharing a VPN connection can be more resource-efficient, as it avoids the overhead of running multiple VPN clients on both the host and the VM.
⼻ ParrotOS
The Parrot Project is a community-driven and forever open-source project. The Parrot Operating System a Debian-based Linux distribution designed for security, development, and privacy can be run from a removable storage device, a virtual machine, an IoT device, a Docker image, or a Windows subsystem ( WSL ) check it out. It also comes packed with pre-installed tools essential for ethical hacking, penetration testing, computer forensics, cryptography, privacy, and software development. In a few words, it's the ultimate ship you need to sail the hacking seas! Oh, and most of all... it's...

I know... you're already thinking, 'But d3adr1nger, why should we use Parrot and not some other security distro?' My honest answer? Parrot OS is a constant innovator and disruptor in the open-source security world. And it does it with finesse 😎:
- Home Version for Privacy-First Folks: Parrot OS rolled out a home version, opening up to a whole new audience of privacy-minded people beyond just hackers.
- Spotlight on Indie Security Tools: It shines a light on new indie security open-source tools, which often deliver better results than their more famous counterparts.
- Open to Smart Distro Tweaks by the Community: Parrot OS enthusiastically embraces smart tweaks and changes suggested by the community, fostering continuous improvement.
- Small Team, Big Impact: Considering it's developed by a small team, the project's significant growth and innovative ideas give me great confidence in its future.
And that's why I prefer it, I am here for the journey, and not for the destination. To underline my point of view here is a small part from the book Cathedral and the Bazaar:
Open-source development, much like a bustling bazaar, thrives on the diverse contributions of its global community, accelerating innovation and ensuring robust solutions through the collective scrutiny and creativity of its many participants.
Setup ParrotOS with VirtualBox
Follow these steps to download and install Parrot OS on a virtual machine.
- Download Parrot OS: I like downloading the .torrent file cause it's faster. I use qbTorrent on Windows. Feel free to explore other options also.
- Install Virtual Box: If you haven't already.
- Create New Virtual Machine: The Parrot OS team has made this process straightforward. Simply double-click the
.ovafile that has been downloaded by the.torrentand follow the on-screen prompts to complete the setup. - Configure VM Settings: Although most settings are configured automatically in the previous step, you can manually allocate appropriate resources (CPU, RAM, and disk space) to optimize performance.
- Install and update: Always update your VM after installation. Parrot OS will display a GUI prompt to guide you through the update process
straight from the source Quick Recs: The OS can run on machines with 512 MB of RAM and 2 cores, but at least 2 GB and 2 cores are strongly recommended for both Parrot Security and Home Editions.
Snapshots.
The main reason I use Virtual Machines for hacking-related studying is Snapshots! I can't even count the times that I had broken my main Linux machine back in my university days, a wrong command run with sudo privileges and 💥 there goes your distro! With VM snapshots, I can experiment fearlessly, knowing that I can revert to a previous state with just a few clicks. This safety net allows me to learn and explore without the constant worry of damaging my system, making the learning process much smoother and stress-free.
While your ParrotOS VM is running and is fully updated you can safely create your first snapshot. Click the menu-looking button on your VirtualBox Manager window, as show in the image below.
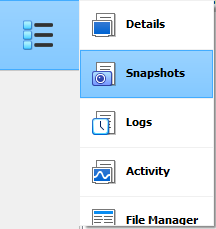
after that super action that you just did,
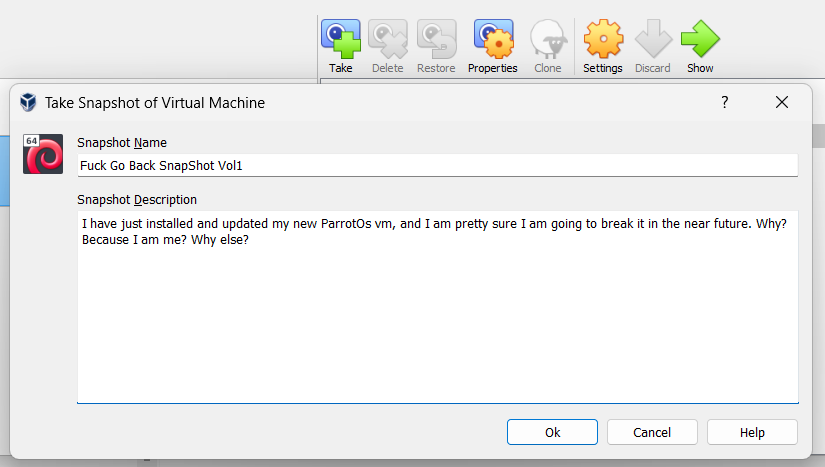
You click the Take button, a Snapshot name, and a description and you are good to go.
Pro note: Make the description as funny as it can get. It's a gift for your future self.
⼻ Viscosity - OpenVPN Client
Think of a VPN like the secret passages of Middle-earth. When you use a VPN, it's like cloaking yourself in the invisibility of Frodo's elven cloak, hiding your true location (IP address), and journeying safely through the internet. Some places in Middle-earth, like the hidden city of Gondor or the Elven realm of Rivendell, are only reachable through specific hidden paths—similar to how some IP addresses can only be accessed through a VPN, providing a secure and exclusive route. This way, you bypass prying eyes like Sauron’s and safely reach your internet destinations, unseen and secure. Viscosity is the map and tools a character like Gandalf uses to navigate Middle-earth. A software application that manages your VPN connections and a necessity to roam HackTheBox's machine IPs, etc... So... yeah... Download this Feel free to use any other OpenVPN Clients you find. 🤓
⼻ HackTheBox - Cyber Performance Center
Now that we have all the tools sorted out, it's time to hack!!!

Look, you should already know HackTheBox by now, the ultimate platform to hone your cyber security skills. For this article, we'll just access a random box from hackthebox labs, let's say Antique, you can pick whichever you want.

After you have clicked the button Spawn Machine, you'll see that an Ip shows up but you can do nothing with it. On the upper right corner of the app, you'll see the following button.
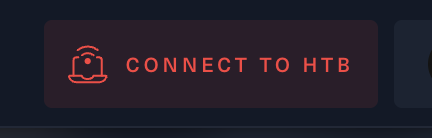
Follow the instructions to download the VPN File and Connect to it:
- Click Connect to HTB
- Click Machines
- Click OpenVPN
- Pick VPN Access and VPN Server
- Click Download VPN
- Double Click the Downloaded file
- Follow Viscosity instructions if any
Once you are connected to the VPN, open your ParrotOS VM with VirtualBox put the network setting Attached to: NAT or Bridged and then from your ParrotOS VM run:
sudo ping <hackthebox_machine_ip>
And behold!
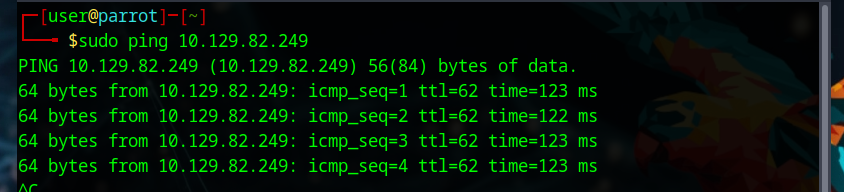
You are connected and ready to hack! How cool was that? For a bonus, try out an Nmap recon command:
sudo nmap -sV -T4 <htb_machine_ip>

#bonus nmap command for HackTheBox machines
nmap -sC -sV -p- -oN nmaps/machines/boxname.txt <htb_machine_ip>
And wait for the results 😀 Happy Hacking fellow nerd!
Reason behind the article
At a recent local Hack The Box meetup, I noticed some students having trouble connecting to the VPN using the terminal. Whether they were on Kali or Parrot OS, they all faced similar issues. I recommended an alternative approach: sharing a VPN connection between their host and VM machines. This method turned out to be a game-changer for them, making the process much easier and more reliable. Seeing how effective it was, I decided it would be helpful to share this method in detail here and put it on "paper". It’s a practical solution that can save a lot of time and effort.
🚀 Spread the Love & Support the Realm
Hey there, fellow Realmer! If this guide illuminated a new path in your coder/hacker journey, your support would mean a lot. Every bit of magic helps.
Support the Realm
🛍 Affiliate Treasures Below: Dive into the depths below the post to uncover some affiliate products I've curated just for you. It's a great way to support the realm and discover some nerdy treasures.
☕️ Coffee Driven Development: Love what you're reading? Fuel my passion for coding with a delicious cup of coffee! Every sip powers up another line of code and helps bring more exciting content your way. Support my caffeine-fueled coding adventures and let's brew up something amazing together! ☕👨💻 Join the journey and BuyMeACoffee

Spread the Love
👑 Crown & Share: If you found value in this post, please give it a crown and share it with your fellow coder/hacker enthusiasts. Spreading knowledge is what Sudorealm is all about! Fun fact the Author with the most crowns inside a realm will be crowned as the Realm King! 🤴
🆇 X Shoutout: Feeling extra grateful or have some cool feedback? Drop me a shoutout on Twitter – I'd love to hear from you! d3adR1nger on X
💬 Join our Discord Server: Join the Sudorealm Discord Server connect with fellow enthusiasts and chat about everything that fascinates you! From new blog post suggestions to seeking support on tricky tutorials. Come, share your ideas, and let's grow together! 🚀🌐
Thanks for being a part of our realm. Every bit of support propels our community to new horizons. Until next time, keep exploring!