Flutter Google Sign In Without Firebase
— 7 min read

Greetings, Flutter community! If you're here, chances are you're on a mission to integrate Google Sign-In into your newest Flutter project but prefer not to rely on Firebase for this feature. Been there, done that, and I get it. Even though, there are plenty of articles out there on implementing Google Sign-In with Firebase, there are not so many guides for our situation. Worry no more, I've got your back! In this guide, I'm going to walk you through every step of the way, ensuring a Firebase-free integration of Google Sign-In into your Flutter app. Ready to offer your users a fresh Sign-In experience? Let's dive in!
Step 1: Google Cloud Console
Before we write any code, we need to establish a connection between our Flutter project and the Google Cloud Console. So, let's start by setting up the Google Cloud Console.
- Navigate to Google Cloud Console: Head over to Google Cloud Console, and sign in with your Google account if you haven't already.
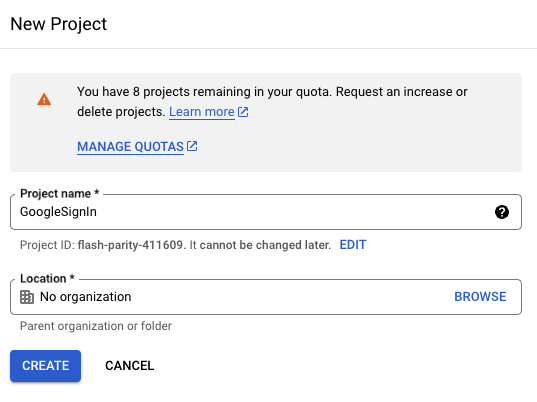
- Create a project: If you haven't created one yet, head over to the project dropdown at the top of the page, and select "NEW PROJECT", give it a name and click "CREATE".

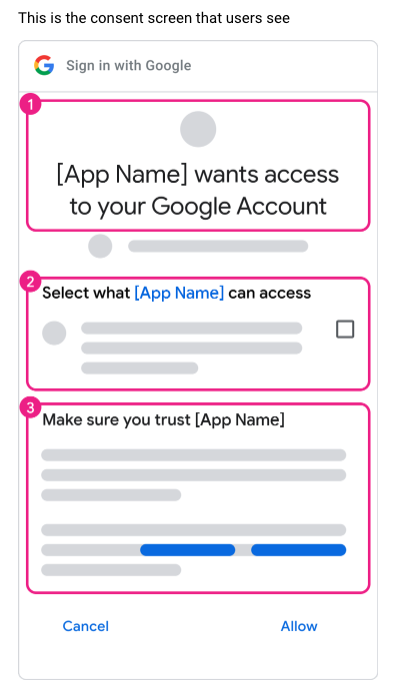
- Configure OAuth consent screen: Navigate to the OAuth consent screen by searching it on the search bar or from the menu bar in the section APIs & Services. Choose the "External" option and click "CREATE". Now, in this screen you have to fill in the necessary details like the application name and user support email, and at the same time you can customize the pop up screen that will appear whenever the users try to Sign-In.
Now, let's take a brief pause from the Google Cloud Console. We're heading into the app to collect essential data needed to finalize the implementation.
Step 2: Application Set Up based on the Device
There are different paths to follow based on the device you're using. Whether you're developing for Android or iOS, the steps for application setup may vary. Let's explore the specific instructions tailored to each platform.
Android Set Up
Our first task is to create an upload keystore, which works as a device-specific signature. Head over to Flutter's Android Deployment Documentation and follow the steps outlined in the Create an upload keystore section. I'll guide you through each step to ensure a seamless understanding of the process:
Generate and Store Keystore
- Use the provided commands or instructions to generate a keystore file. This file is crucial for signing your Android app, so you need to be very careful because it is something you will need later when you want to upload your application.
- Move the keystore file in the '/android/app' folder of your project. Then follow the steps under the Configure signing in gradle section.
Get SHA-1
- To obtain your SHA-1 code, navigate to the 'android' directory in your project and run the command ./gradlew signingReport.
cd android
./gradlew signingReport
After executing this command, a bunch of information will appear in your terminal. Look for the SHA-1 key in the section labeled "Variant: debug" and "Config: debug".
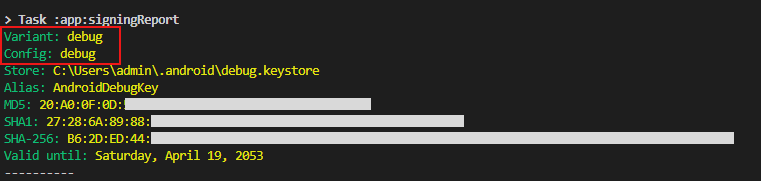 IMPORTANT NOTE: When you are ready to upload the app, it's crucial to use the SHA-1 key from the "Variant: release" and "Config: release" sections.
Android Client Id
Now we can jump back to Google Cloud Console and complete the setup.
- OAuth Client ID: Head back to APIs & Services and select the "Credentials" option. Click on "CREATE CREDENTIALS" at the top of the screen and choose "OAuth Client ID." Now, it's time to specify the system for which we're enabling the Google Sign-In service—in our case, Android. Complete all the required fields, including the package name of your project and the SHA-1 key that we learned how to obtain earlier.
 In case you don't know where to find the package name, all you have to do is go to 'android/app/build.grandle' and the name of your project is the value of applicationId
iOS Set Up
Setting up for iOS is relatively simpler. Let's begin with the Google Cloud Console and create an OAuth Client ID.
- OAuth Client ID: Follow the previous steps, and when you reach the "OAuth Client ID" screen, choose iOS as the target system. All you have to do to complete the form, is to fill the Bundle ID text field.
- Bundle ID: The id we are looking for, is located inside the ios folder. Navigate to 'ios/Runner/Info.plist' and find the
<string>value from the<key>CFBundleIdentifier</key>
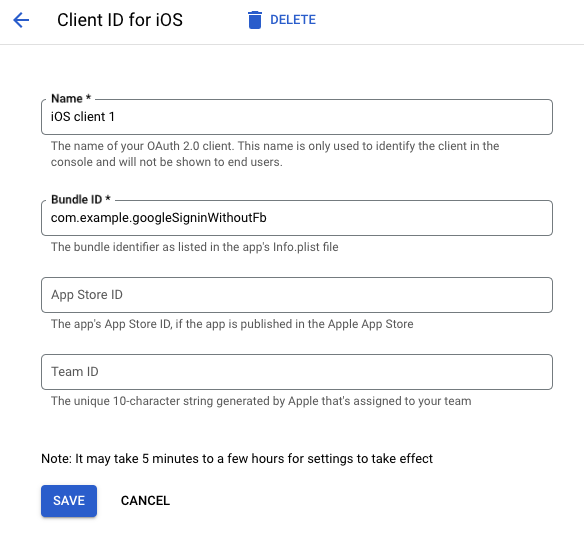 IMPORTANT NOTE: When your app is published in App Store, you have to jump back in iOS Client form, and fill the App Store ID field, otherwise the feature wont work.
When you create the iOS Client, a pop up message will appear in your screen.
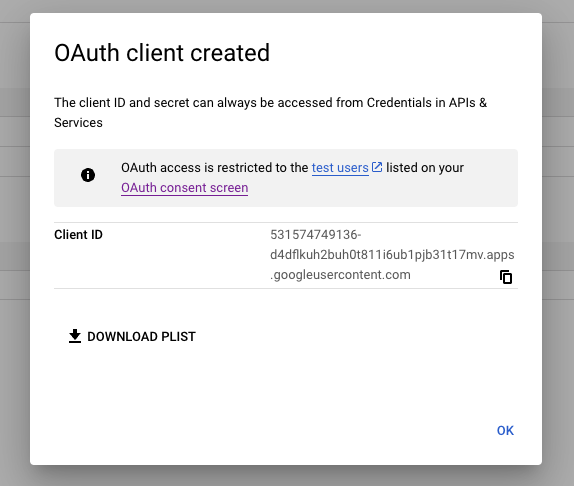 Here, you need to download the .plist file by clicking the "DOWNLOAD PLIST" button. Then, rename the downloaded file to GoogleService-Info.plist and place it inside 'ios/Runner' folder. To ensure the 'ios' folder incorporates these changes, open the terminal and run the following commands:
cd ios
pod install
Executing these commands will ensure that the app absorbs the new files, making the new feature operational. Now that our setup is complete, let's dive into the code to integrate Google Sign-In into your Flutter app.
Step 3: Code Implementation
The toughest part is behind us. With everything set up, the code implementation is as easy as it gets.
Package
The only package we need, is the google_sign_in. Navigate to your pubspec.yaml file, and add the latest version of this package.
Dart code
void googleSignIn() async {
    // Initialize GoogleSignIn with the scopes you want:
    final GoogleSignIn googleSignIn = GoogleSignIn(
        scopes: <String>[
            'email',
        ],
    );

    // Get the user after successful sign in
    var googleUser = await googleSignIn.signIn();
}
The variable googleUser will look like this:
{
    displayName: username,
    email: [email protected],
    id: 73459345371102349,
    photoUrl: https://lh3.googleusercontent.com/a/xxxxxxxxxxxxxxxxx,
    serverAuthCode: null
}
This way, you can create a User Model and use whatever you want based on your application needs.
Step 4: Web Client IdToken
Step 4 is specifically for those who require the Web Client IdToken in their project. If you find the need for this, here's how to include it in your project.
- OAuth Client ID: Go back to Google Cloud Console, navigate to APIs & Services and select the "Credentials" option. Click on "CREATE CREDENTIALS", choose "OAuth Client ID." This time, we have to choose the Web Client and create a new key.
- strings.xml: Go to your root of your project, and navigate to 'android/app/src/main/res/values'. Then, create a new file strings.xml which should look like this:
<?xml version="1.0" encoding="utf-8"?>
<resources>
    <string name="default_web_client_id">{YOUR CLIENT ID}</string>
</resources>

Conclusion
And there you go! You've successfully set up Google Sign-In in your Flutter project without relying on Firebase. With only few adjustments based on the device, you've empowered your users with a significant and secure method to sign in to your application. Well done on this achievement in elevating your app's user experience!
If you enjoyed this article and want to stay connected, feel free to connect with me on LinkedIn.
If you'd like to dive deeper into the code and contribute to the project, visit the repository on GitHub.
Was this guide helpful? Consider buying me a coffee!☕️ Your contribution goes a long way in fuelling future content and projects. Buy Me a Coffee.
Feel free to reach out if you have any questions or need further guidance. Cheers to your future Flutter projects!


